The installation of print queues is done through
- the File Explorer
Open ‘My Computer’ (or my PC) - Internet Explorer (not other browsers, FireFox, Chrome, …)
Step 1
Fill the address field with the server’s name preceded by two backslash:
\\<server name> (usually, backslash is obtained pressing ‘Alt’ + ‘<‘)
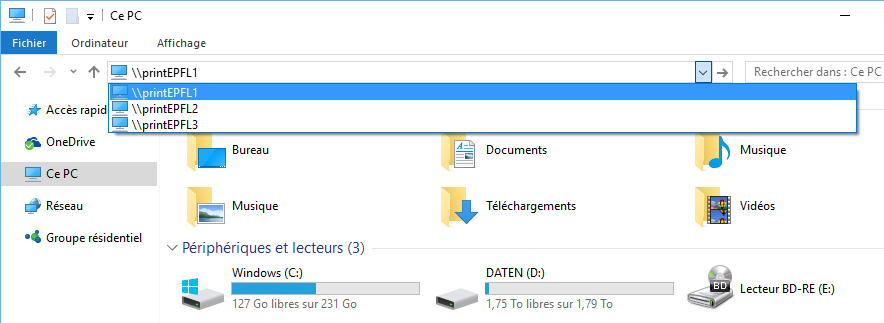
Server names:
- printEPFL1 : access to the students deserved pool.
- printEPFL2 : access to the co-workers deserved pool.
- printEPFL3 : access to the off-pool printers and plotters.
- printEPFL4 : access to the students deserved pool (PCL queues)
- printEPFL5 : access to the co-workers deserved pool (PCL queues)
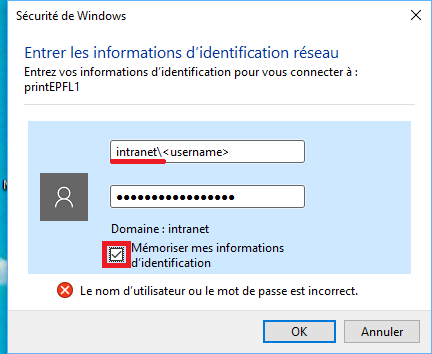
Once you entered a network address, you will be asked to authenticate.
Step 2
Therefore use your Active Directory account: intranet\your_username and your password
Your Active Directory password is often the same as your GASPAR password.
Step 3
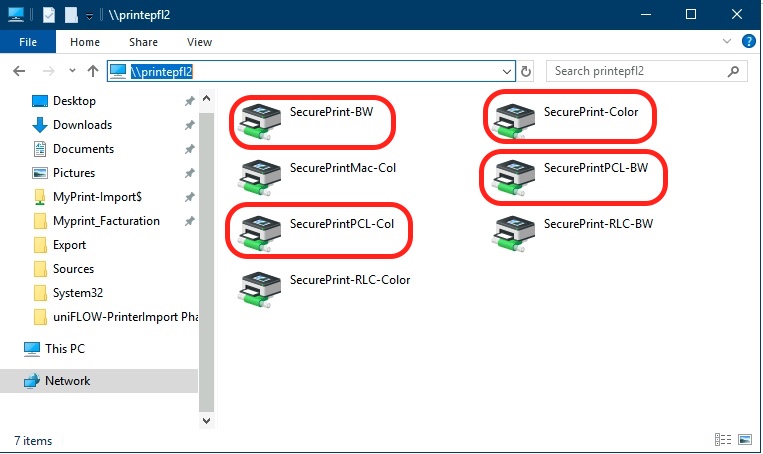
Double-clic on the printer/pool that you want to add (or choose “Connect” by a right-clic).
The “POOLs”
- SecurePrint-Color : to print in Color, in PS format (PDF file, for example)
- SecurePrint-BW : to print in Black & White, in PS format (PDF file, for example)
- SecurePrintPCL-Col : to print in Color, in PCL format (smaller size), used for Microsoft App
- SecurePrint-BW : to print in Black & White, in PCL format (smaller size), used for Microsoft App
NB: SecurePrintMac-Col are for MacOS users, and RLC for special use in the library
see documentation
see documentation
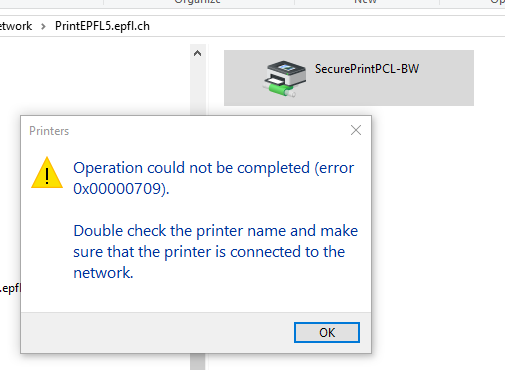
1. Server name
In case of an “Operation could not be completed” message, remove “.epfl.ch” from the server name.
-> Only \\PrintEPFL1 and not \\PrintEPFL1.epfl.ch
2. Authentication error
If your password is rejected, it’s sometimes necessary to precede your username by the domain
intranet\your_username
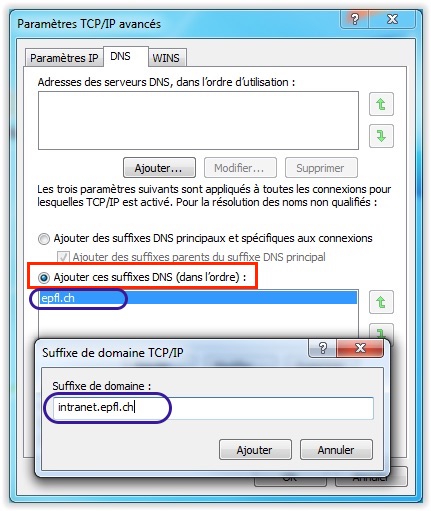
3. Search domains
You computer needs to be connected to internet (by cable or wifi) and needs to have search domains in the default network configuration “epfl.ch” et “intranet.epfl.ch”.
Configuration :
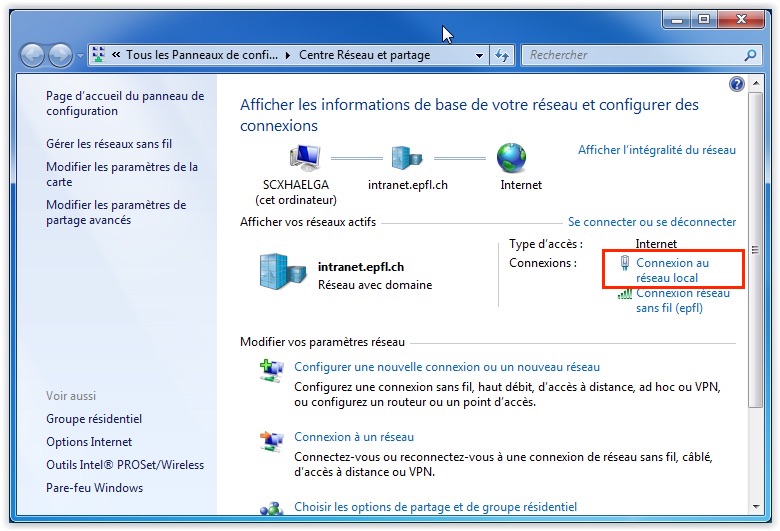
- Go to “Network and Sharing Center”
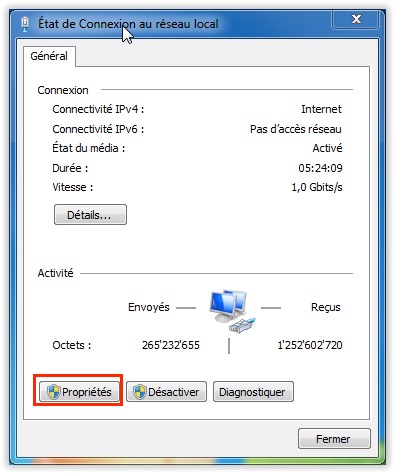
- Choose Internet, then “Local Area Connection” | properties
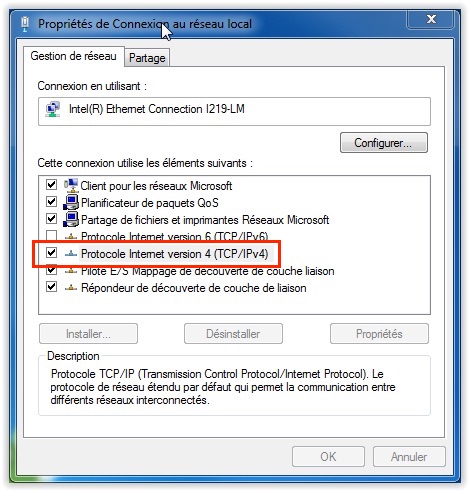
- Internet Protocol Version 4 (TCP / IPv4)
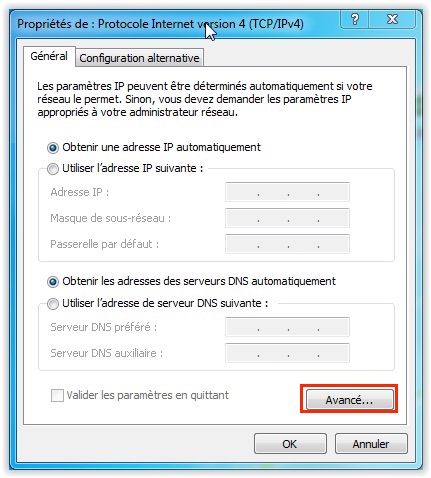
- Advanced…”Choose “Add these DNS suffixes”
- In the “TCP / IP Domain Suffix” box, add “epfl.ch” and “intranet.epfl.ch”
- Click “Add” and then “OK”
- Restart printing
This also solves the same problem for the “SecurePrint-BW” queue