RESERVATION RULES AND BOOKING FEES POLICY:
- No booking.
- 24/7 booking/use is possible with CMi+1 extended access.
- No Reservation.
Contents:
- Main Control
- Bright, Dark Field and DIC
- Controls by GUI
- Measurements and overlay annotations
- Save as Projects
- Links
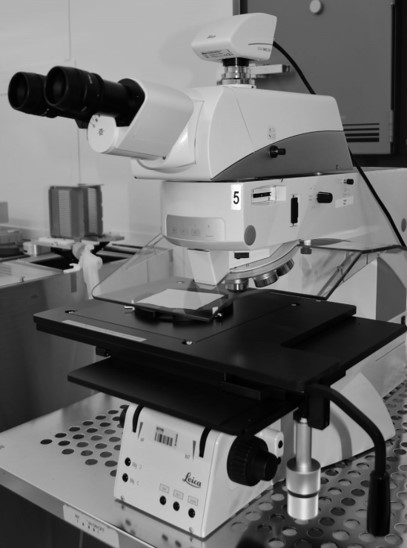
I. Main Controls
1st sit comfortable in front of the microscope
Adjust sit position and Eyepieces distance (use with oculars without camera)
Take care of actual COVID-19 MICROSCOPES usage
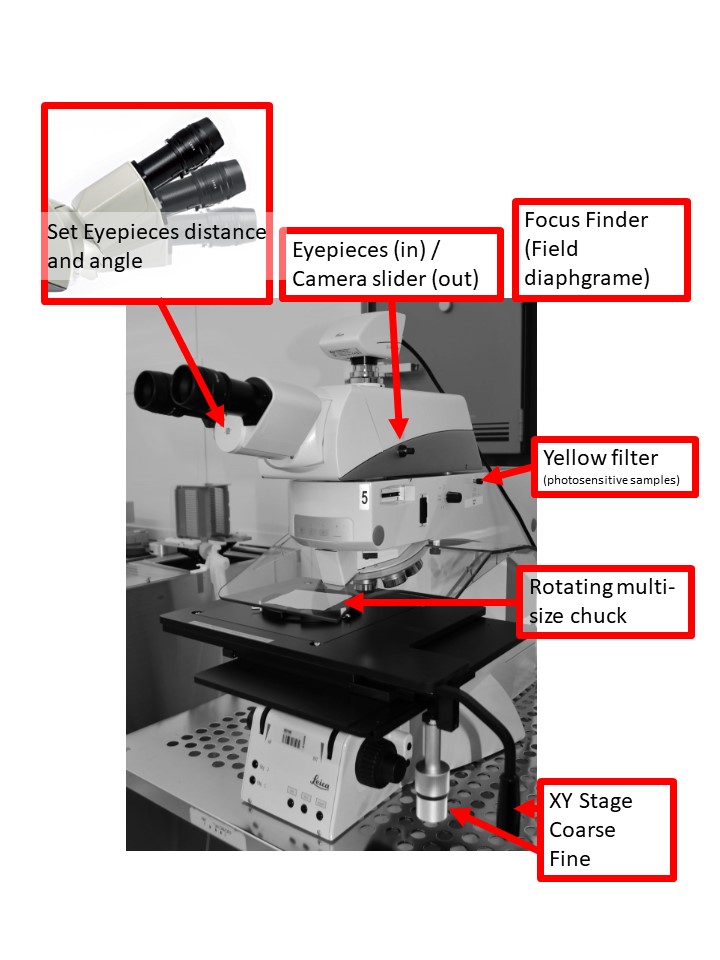
Using as a standard inspection microscope
- Set eyepieces position adapted to your face morphology
- Push slider inside to get light in the eyepieces
- Push yellow filter inside to protect your photosensitive sample from UV and visible blue light
- Take the XY stage right front with the coarse handle
- Place you sample on a small size clean-room paper in the middle of the rotating chuck.
- A limiting ring field diaphragm can be inserted for easy adjustment of focus distance. All optics are long focal distance objectives for safe initial Z adjustment
- Select objective No 1 (5x)
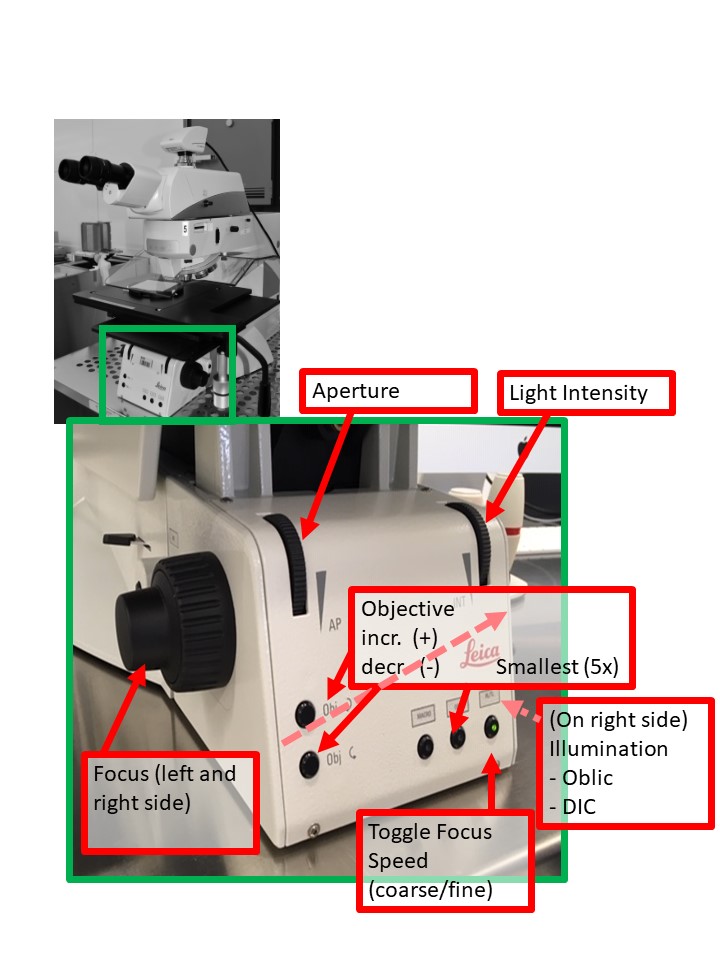
- Move region of interest under the objective. Adjust roughly light illumination. start to focus by adjusting the Z rotating command available left or right hand side. Focus on the annular field diaphragm edge (focus finder). Remove focus finder
- Adjust aperture diaphragm to the desired deep of focus. Readjust illumination for comfortable vision. Fine XY stage and Z focus can be now fine tuned.
- Take care of transparent wafer to focus on the front side ! Thick transparent sample may crash with highest magnification objective !
- Now you can navigate safe on the whole wafer area, changing objectives for highest magnification, changing deep of focus with aperture
- Optional illumination function are available on the right side
II. BF, DF and DIC illumination

Start visual observation in Bright Field mode (BF). In case no light using eyepieces first check for illumination settings as follow:
- Set light intensity high enough to see the incident illumination spot on your sample. Open aperture diaphragm
- Check rotating filter roller ring position. Position 2 correspond to the default BF configuration.
- Double check that you reflecing sample surface is perpendicular to the optical axis of the instrument.
Interesting alternative illumination are:
- Oblique (sideways) illumination to reveal for more 3D details.
Available from the right side upper option button - Dark Field illumination (DF). To reveal for non perpendicular light reflection. This method is useful to search for defects like pins holes or enhanced contrast on photo-resists edges.
Rotating filter roller ring position 3. Re-open aperture diaphragm to the maximum to collect out of optical axis light.
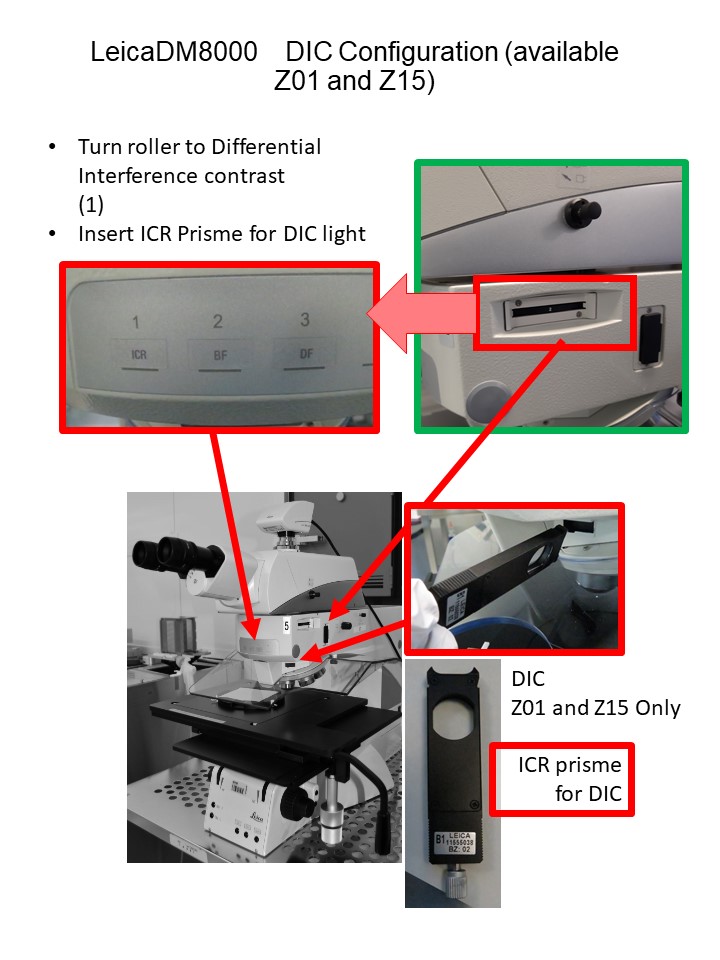
- Differential Interference Contrast (DIC) are available only in zone 01 and zone 15. For use with 50X and 100x objectives. Rotating filter roller ring position 1. Re-open aperture diaphragm for maximum light and reduced deep of focus.
- In addition a differential prism filter must be inserted (above picture) and tilted to find optimum contrast (or color gradient)
III. Control with graphical interface GUI

LAS X Graphical user interface can be configured by any users. Above picture is an example of standard configuration for the “Aquire” tab section with following elements:
- Main palette at the left side. Use for hide/show/open multilevel menu window (left stripe hide/open). Leave a blank space with camera window for easiest reading (show when no left stripe).
- Camera window. Live/freeze status indicator by a blinking dot or steady image icon at the upper left corner.
- Transparency of open window helps finding open menus. Resize the camera window for additional space on the right side if necessary.
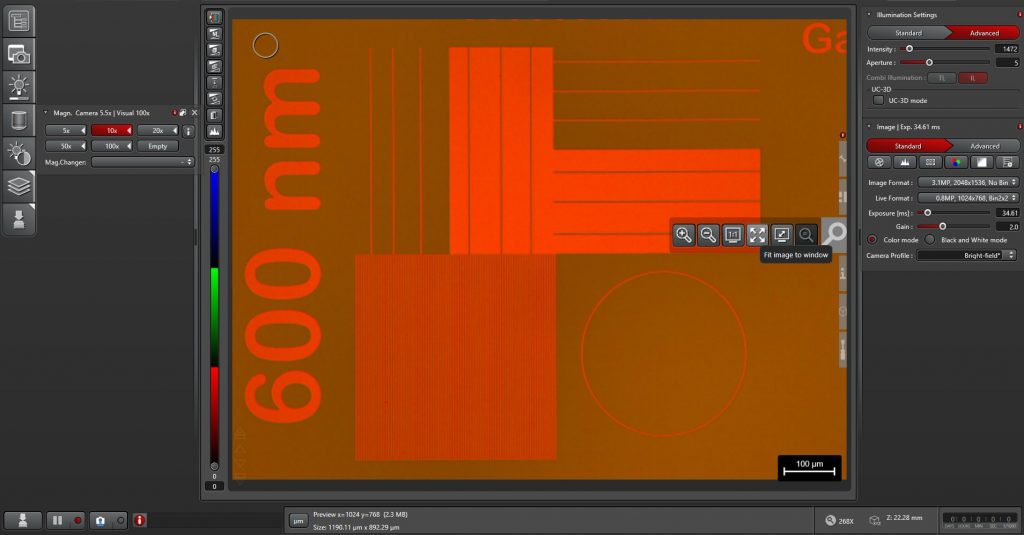
Left palette in camera window give your access to resize / zoom picture
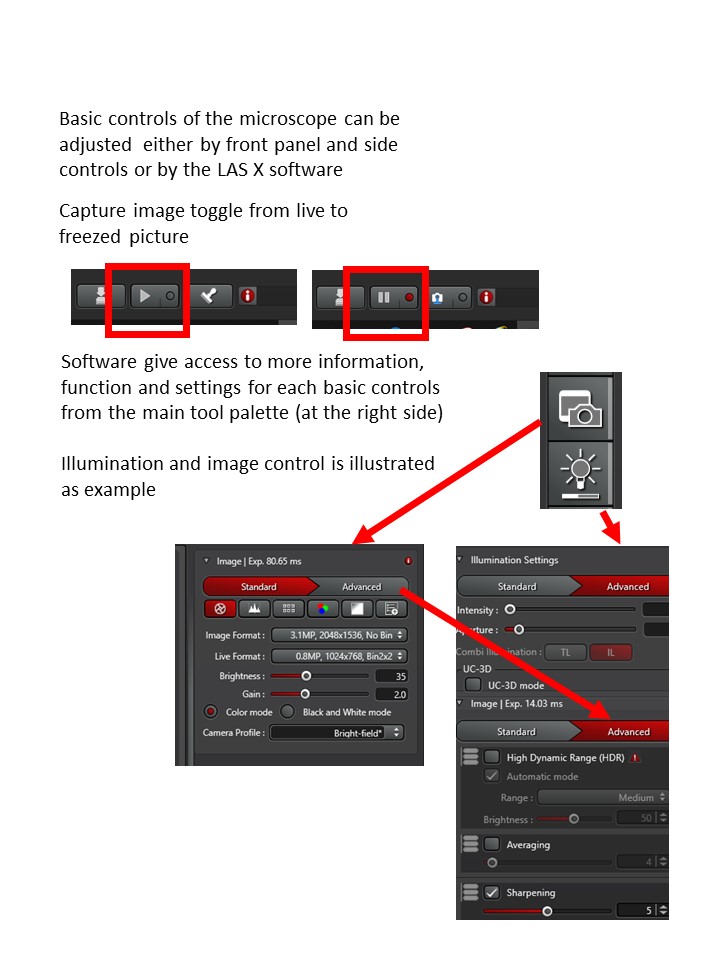
Illumination acts on the light source (LED). Image play with the camera setup.
Note on “Image” settings.
- Standard: Get access to auto/manual exposure. Use manual exposure with moderate gain to control exposure time. (10 to 50 ms is optimal in BF mode)
- Advanced: Activate Sharpening (set ot 5) for standard picture
IV. Measurements and overlay notes
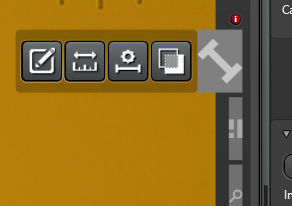
Activate from top icon in left palette of camera window the desired function:
- text annotation
- Classical measurements tools
- add/configure scale bar
- .
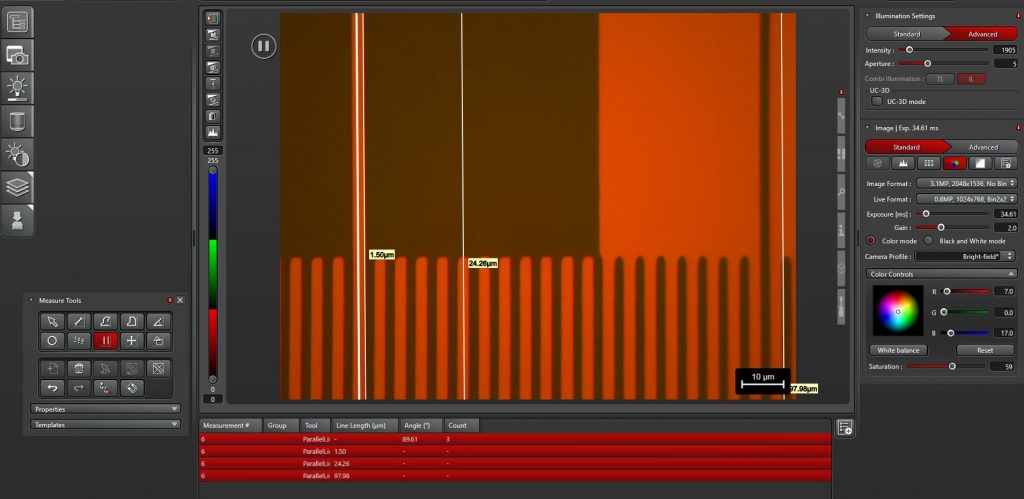
Measurements results appear at the bottom.
Each result can be edited mouse select (in red)
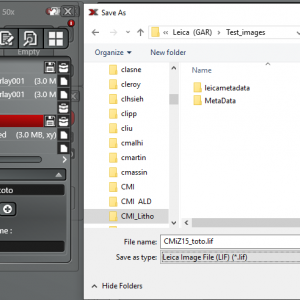
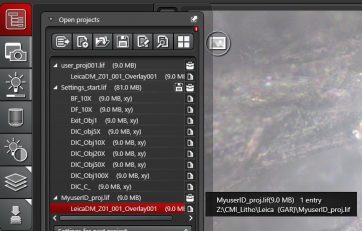
V. Save as Projects
LAS X software save all images in a temp buffer included unsaved and last live picture images. Unsaved images in temp buffer are difficult to retrieve in the huge temp buffer.
Browsing by Project is recommended for retrieving pictures and measurements easily . This option is set at LAS X start up init.
Project native format (.lif) include image, sequences and measurements in a single file. Saving project on the local disk partition D:/ speed up the disk access time.
- Leave the live image mode before selecting Browser icon (Browser may not respond immediately in live mode).
- Access move pointer or click on «Browser» icon window in the main palette.
- Select secondary browser icon to view for Open projects”. Create a new project or open an existing one.
IMPORTANT in multi-user environment
Always define the working project as follow
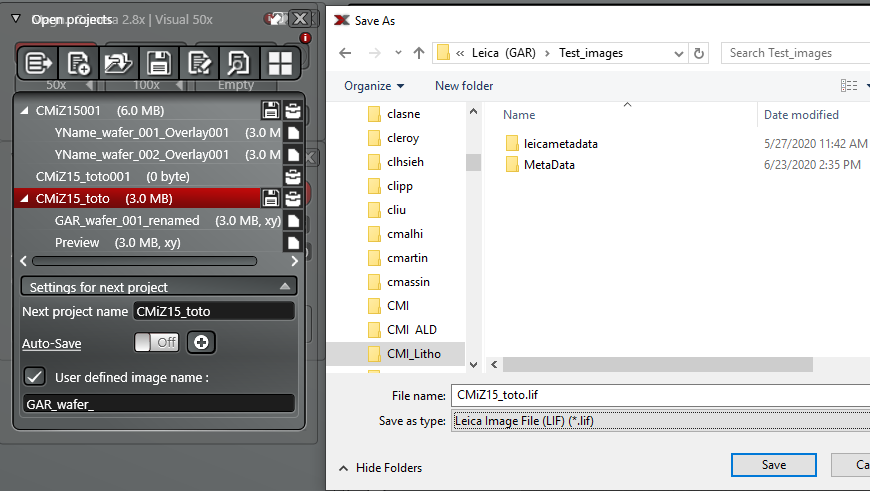
- Check the active path. Use open project to fix path locally to D:/
(Using a external drive lower considerably access time for all disk operation) - Create new project or open an existing one.
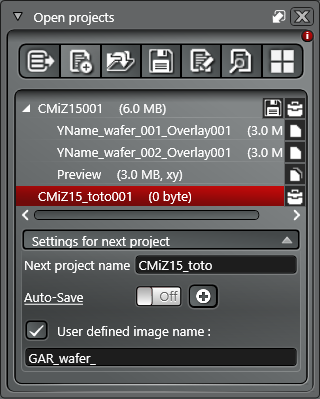
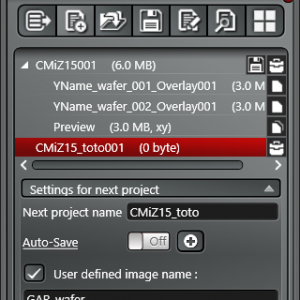
– Use “settings for next project” or rename it after creation
– Disable Auto-save. Preview or recorded image are stored automatically.
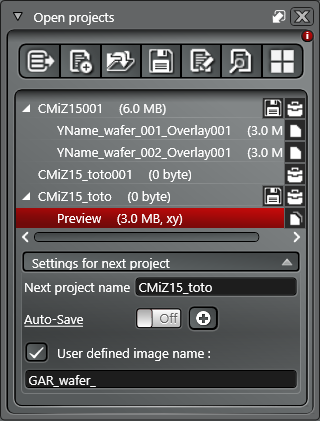
– Activate “user defined image” to add a prefix - Live picture name is “Preview” automatically renamed by click on freeze picture button.
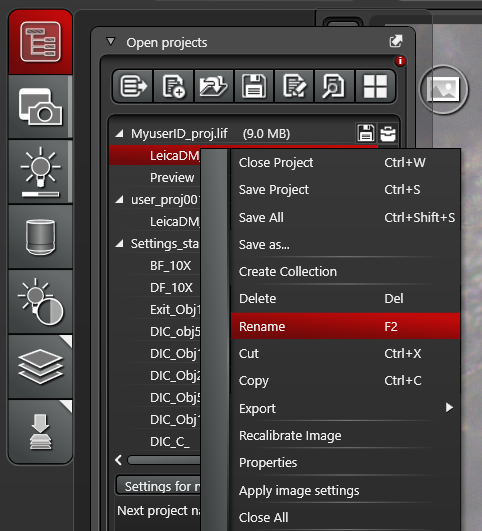
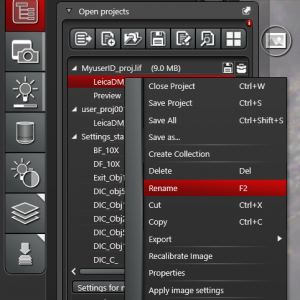
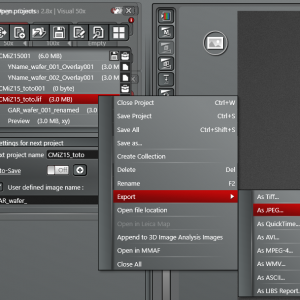
- Picture Select+right click Rename, delete and additional features
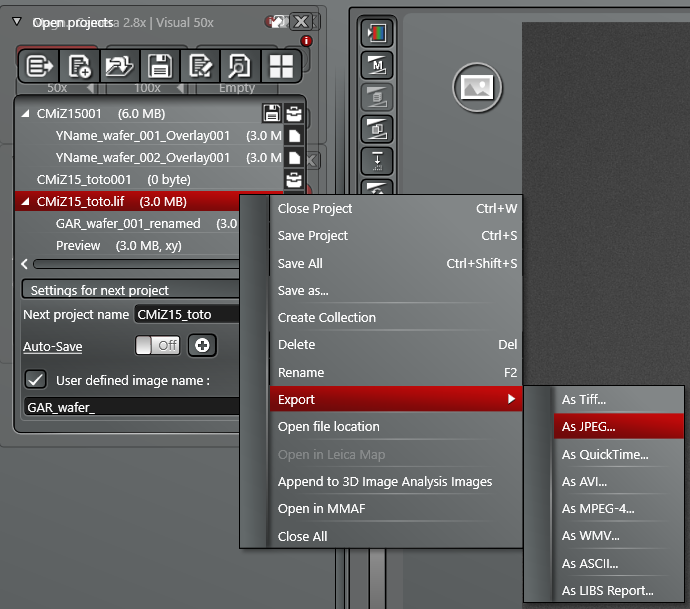
- Project Select+right click for global project save, rename, …
- Project Select+right click to export all images of the current project. (remote server recommended). This operation run in background.
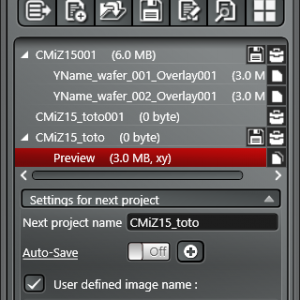
- In live mode “Save Project” automatically rename the “Preview” picture. A new “Preview” is created (cassette icon remains)
In freeze mode “Save project” clear the cassette icon. - To finish your work always close your project.
This prevent next user to add “preview” or is own pictures in your project.