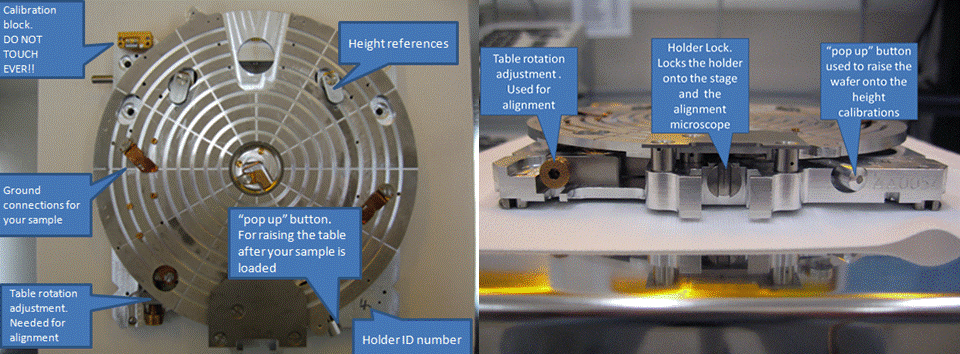
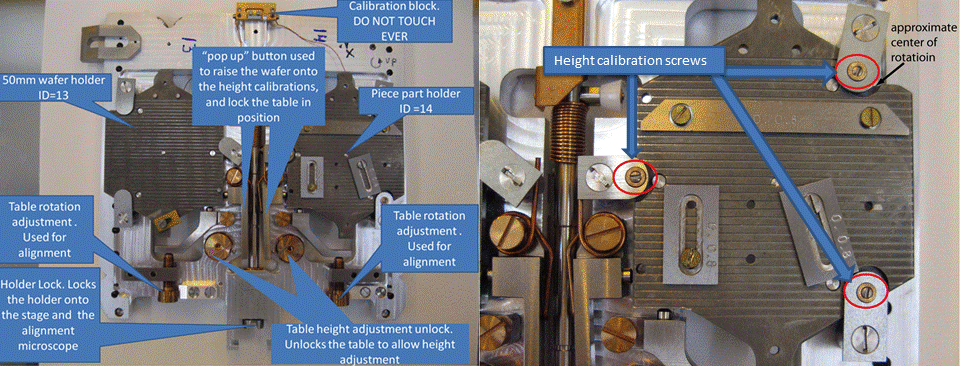
Any wafer or piece-part sample must be first mounted onto an ebeam tool holder before it can be loaded into the tool. Different type holders for different type substrates are available, the most commonly used ones are described below. All holders are delicate instruments and must be handled with a great care!!!
100mm wafer holder

50mm wafer and piece-part holder

Other holders
150mm wafer, 5inch mask, and 75mm wafer holders are available on request. They are stored in a safe place out of the daily operation area.
Holder transfer window

The most commonly used holders are kept in the holder transfer window between the ebeam tool chamber and the resist processing room. The holders rest on the top of a plate the temperature of which is being constantly monitored and actively controlled with a water chiller. The goal is to keep the holders at the temperature as close to that of the stage inside of the ebeam tool to minimize the thermal drift during the writing process. Holders should only be removed from the holder window for the shortest periods of time possible for their loading and unloading and for mounting and de-mounting of the samples. Mounting and de-mounting of the wafers and other samples should only be performed in the designated area on the microscopy table near the holder window.
Sample/Wafer mounting

In order to mount wafer onto the 100mm wafer holder, place an empty holder on the soft cleanroom tissue in the designated area. The holder needs to be set down gently to avoid any possible damage (dirt contamination, scratches) to the sapphire pins at the bottom and front side of the holder. These pins control the exact positioning of the holder on the stage and any damage to them renders the holder unusable. Another part of the holder that is extremely delicate is the calibration block. It is advised to always place the holder with the calibration block and the front sapphire pins facing away from the user, to minimize the likelihood of accidental touch.
To mount the wafer, push down the wafer table (for top reference holders only). Take the wafer by the minor flat (assuming normal CMI Si test wafers) and push it under the large height reference. Slide it back so that it is under all 3 height references, then adjust its position so that it is in contact with all 3 position reference pins. Pop the table up using the height lock button. Use the special tool provided to apply the grounding contacts. Remember that resist is (usually) insulating and you will need to move the ground connection slightly to make good contact with your wafer.