Preliminary and fundamental remarks:
- SAFETY OPERATOR MANUAL TO OPERATE ON CMi WETBENCHES (HERE)
Contents
I. Introduction
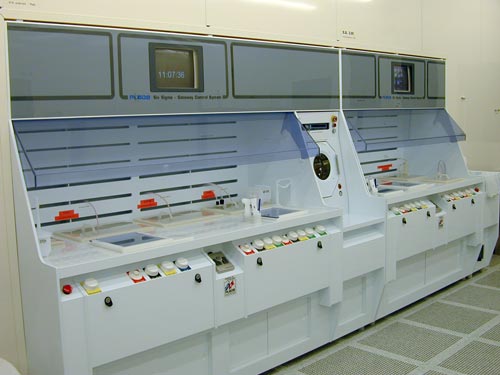
The baths of the Plade Metal in zone 2 are arranged as depicted in figure 1 and they target etching / removal of Aluminum, Titanium and Silicon based layers (polymorphous, amorphous, oxides, nitrides).
Depending on the application, the bath may be fitted with a temperature adjusting system and with a circulating pumping system to activate etching.
TT: Trickle Tank (fine rinsing)
Figure 1: Schematic of the Plade Metal bench
| Bath N° | 4 | 5 | 6 | 7 |
| Contents | ANP Circulating bath, heating system. | Diluted HF Static bath, room temperature. | Reclaim (HF 50%) Circulating bath. Bath filled on demand. | Poly Etch Static bath, heating system. Bath filled on demand. |
| Application | Patterning / Removal of Aluminum | Removal of Titanium or of native oxides or of DUV resist residues post-stripping on samples with metallic contents | Removal of oxides (Thermal, TEOS, LTO or PVD oxide) and nitrides (stoechiometric or low stress) | Removal of silicon based layers (amorphous silicon, semi-cristallin silicon and polycrystalline silicon or polysilicon) |
II. Standards at CMi
| Material | Bath N° | Chemicals | Mask | Etch rates (nm/min) | T (°C) |
| Al | 4 | ANP H3PO4 85% + CH 3COOH 100% + HNO3 70% 83:5.5:5.5 | PR | 300 | 35 |
| Ti Native SiO2 DUV resist residues post-stripping | 5 | Diluted HF HF(49%):H2O 1:50 | PR | >1000 | 20 |
| SiO2 | 6 | Reclaim HF(49%) | – | SiO2: 1500 Si3N4: 12 SixNy: 4 | 20 |
| aSi, PolySi | 7 | Poly Etch HNO3(70%):HF(49%):H2O 50:3:20 | PR | 730 | 20 |
III. Modus Operandi
- Login on the Plade Metal using zone 2 computer
- If applicable, activate the circulating system and the heating system after having checked/changed the set point. If working at room temperature, there is no need to activate the heating system
- Adjust the timer according to the etch rate and the wanted result
- Load the wafers in one of the dedicated Teflon carrier and put the handle on
- Full protection is now required (apron, face shield, chemical gloves) before going further
- Once the wanted temperature is reached, open the lid of the bath and gently plunge the carrier into it
- Start the timer (with clean hand)
- Rinse the gloves and gently clean the bath’s surroundings with a moist paper (several cleanings/rinsings are necessary)
- Wait the end of the etching. Remove the individual protective equipment if waiting time is long. Please fill-in a chemical label to inform other users about your running process
- If needed, get ready with the individual protective equipment a few minutes before etching is supposed to finish
- A buzzer indicates the end; press once on the timer button to stop the buzzer
- Open the FFR lid and gently transfer the Teflon carrier from the etching bath to FFR
- Activate the FFR button
- If applicable, stop the heating system and the circulating system of etching bath
- During FFR, rinse the gloves and gently clean the etching bath’s surroundings with a moist paper (several cleanings/rinsings are necessary)
- When FFR is finished, switch the Teflon carrier to the Trickle Tank TT
- Once resistivity is reached (~12 Mohm.cm), put the carrier in the spin rinser and dryer SRD (the carrier’s handle must be removed)
- A recipe is already selected. Just press STOP and the START
- When the SRD is finished, get the wafers back and put the carrier where it belongs
- Carefully check the cleanliness of the wetbench before taking off the chemical protection (apron, face shield, chemical gloves)
- Perform wetbench logout on zone 2 computer
Any droplets of any kind MUST be removed from the wetbench before leaving it. Suspicious droplets must be cleared using a moist paper (2 to 3 cleanings/rinsings are necessary) and remaining water droplets must be removed with absorbent paper.