File upload/download
Notebooks are simple text files, so they can easily be sent by email, uploaded on a website or on Moodle, etc., just like you would do with any other type of document (pdf, doc, etc.).
- To execute a notebook that someone has shared with you, you can upload it to noto by drag-and-dropping the file onto your workspace.
- To download a notebook from your noto workspace to your computer, right-click on the notebook in the left pane of the noto interface, then select “Download” in the contextual menu.
Shareable URL links
It is possible to create shareable URL links with a tool called nbgitpuller that works with git.
Please note that simply copying the URL of a file from your noto workspace and sending this URL to someone else will not work, as files in your workspace are accessible only to you.
Using a nbgitpuller link
When clicked, a nbgitpuller link will automatically do the following for the person clicking it:
- Launch Noto and open their personal workspace.
- Clone your git repository in their personal workspace, or pull it if they have already clicked on the link previously (nbgitpuller automatically handles merging conflicts when necessary).
- Open a notebook of your choice.
In that way, they can very simply access the notebooks from your git repository without needing to know anything about git.
Creating a nbgitpuller link
To be able to create a nbgitpuller link you must:
- make your files available into a git repository hosted on a git server such as gitlab.epfl.ch.
- ensure that the visibility of this git repository is set to “Public”.
Then follow the steps below:
- Go to the nbgitpuller link generator: https://nbgitpuller.readthedocs.io/en/latest/link.html
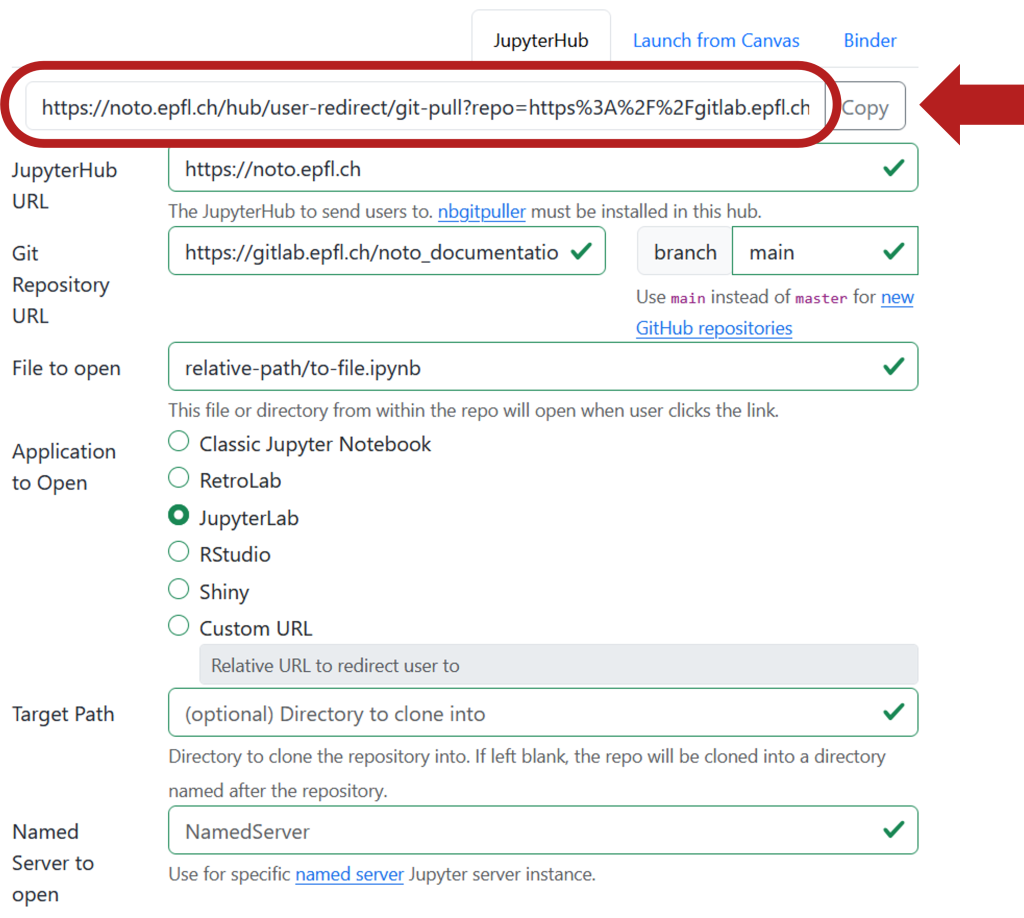
- Fill out the form:
JupyterHub URL: enter “https://noto.epfl.ch” (without the quotes)Git Repository URL: enter the public HTTPS URL of your git repository without the “.git” at the end, for example “https://gitlab.epfl.ch/noto_documentation/repo-name”Branch: make sure to enter the name of the branch, usually this name is “main”File to open: enter the relative path to the file you want noto to open, for example “relative-path/to-file.ipynb”Application to Open: select “JupyterLab”
The other parameters can be left as is.
- The shareable URL will appear at the top of the form, as illustrated below:
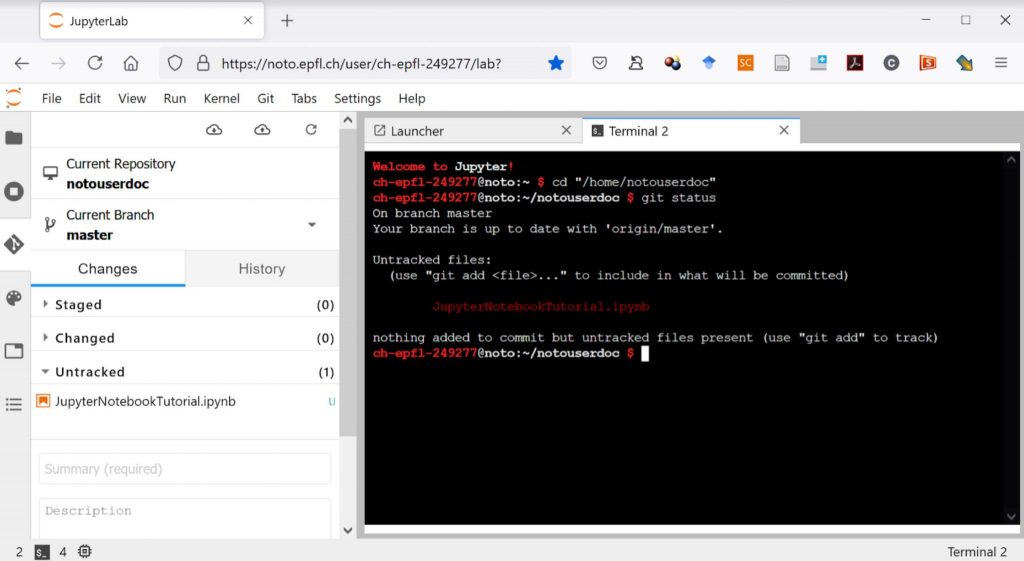
- Before sharing the link with your students it is important that you test it! By pasting the link in your web browser, you should first see a page like the one in the screen capture below, and then you should get sent to the desired notebook.

Watch out: After testing the link, you will have a second copy of your repository in your noto workspace, you might want to delete this new copy right away to avoid confusion.
Using git in noto
You can easily access your git repository from noto:
- using the command line: open a terminal and use your usual git commands
- using the point-and-click interface integrated into JupyterLab, accessible from the “Git” menu at the top of the Jupyter window.
Please see our documentation to set up SSH authentication to avoid having to repeatedly enter your login credentials.
Collaborative editing
Contrary to Google Colab for instance, noto does not support real-time collaboration yet.
Noto supports collaborative work through git. This means that while several people can edit the same notebook simultaneously, they will not see each others’ modifications until they are committed and pushed to the repository (including eventual conflict resolution).