
Authorized:
– Substrates: Si, Sapphire and SOI wafers (Ø 100mm)
– Materials: Only clean substrates
Strongly forbidden:
– Substrates: All except those listed in the “Authorized” section.
– Materials: All except those listed in the “Authorized” section.
Chips / wafer pieces are forbidden. Please use the Plassys MEB550S as an alternative.
Please read carefully Restrictions and precautions before starting !
Contents
- Introduction
- Equipment description
- How to use the system
- Restrictions and precautions
- Photos Gallery
I. Introduction
The Plassys MP500S is a UHV sputtering tool specially designed for quantum applications
The system allows monolayer or multilayer deposition of metals, co-deposition and oxides growth.
The system is composed of a loadlock and an sputtering chamber with each their capabilities:
II. Equipment description
Dimensions and capabilities
2 x substrates holders are available:
- One for 100 mm wafers.
- One adapted for chips.
Only one substrate holder can be loaded and used in the equipment at a time.
Ion source
The ion source is gridded type. The ion milling is done in the loadlock.
Ozone generation
Ozone can be generated if needed.
Deposition
The system is equipped with two DC generators and one RF generator for the sputtering process on the 4 available targets. A second RF generator can be used to performed rf bias on the substrate.
Heating
The heating of the substrate is done in loadlock. The maximum temperature is 750 °C. Please note that as usual, the real temperature of the sample differs from the heating element.
Oxidation
Material oxidation can be done in oxygen atmosphere using static or dynamic modes.
Pumping
The Loadlock is equipped with turbomolecular pump.
The Evaporation chamber is equipped with a cryogenic pump.
III. How to use the system
Run a process
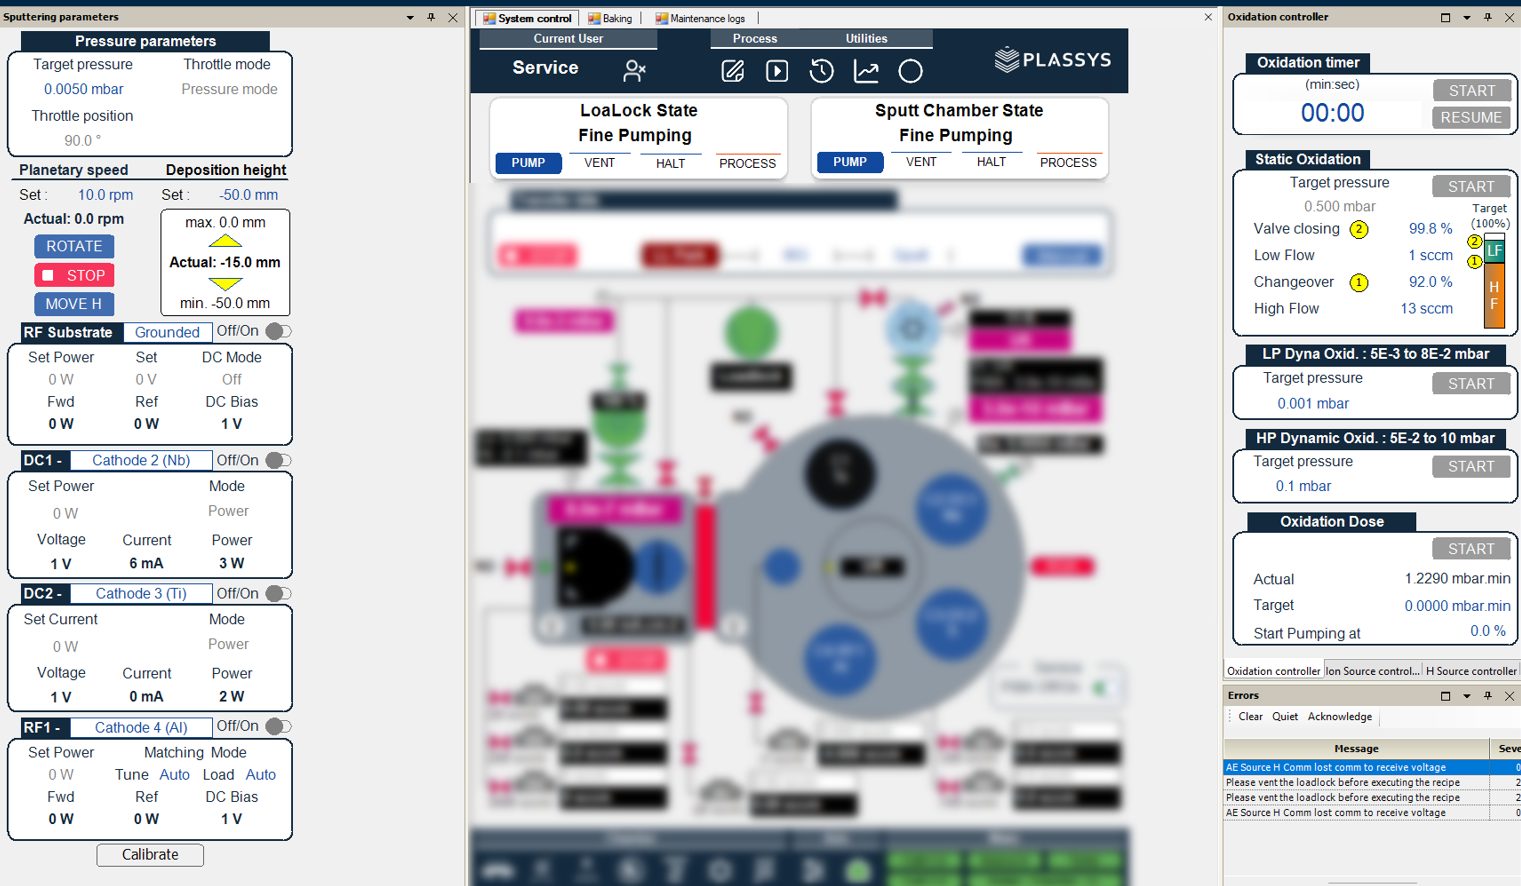
- Control if the account “operator” is selected. If not, press Current user and log in with the username: operator & password: ope.
- Vent the loadlock LOAD-LOCK state → Vent.
- Mount the sample on the substrate holder.
- Release / remove screws by using the Allen key for M3 screws.
- Select the proper / adapted parts to hold the sample.
- Place the sample on the substrate holder.
- Use the precision tweezer to hold parts and tighten gently screws with the Allen key.
- Confirm that everything is secured before going further.
- REMINDER : Restrictions and precautions
- Open the loadlock and place the substrate with the process face down. Close the loadlock.
- Click on Run Process to open the Process Execution window.
- Select the process Browse → Open.
- Execute the process selected Execute.
Note: It is recommended to limit the exposure of the loadlock to the air. Therefore, close the door even if the loadlock is kept at atmospheric pressure for several minutes! In case of the mounting of the sample on the holder takes a longer times, do not hesitate to pump down the loadlock in between.
Recipe edition
Please respect points below:
- Do not modify a recipe which is not yours!
- Respect the naming system for the title of the recipe : username_description-of-the-process.prg
- Sort recipes by lab’s folders.
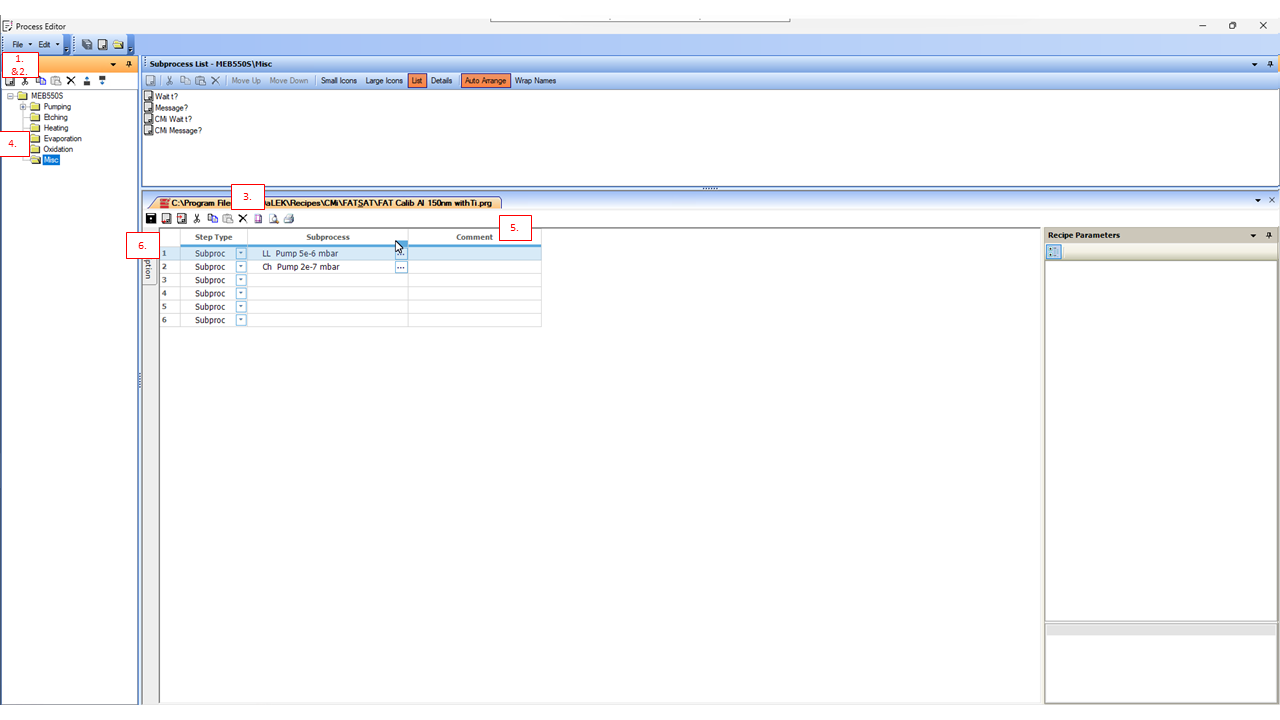
- Click on Edit process to open the Process Editor.
- Open the recipe File → Open Recipe… OR Create a new recipe File → New Recipe. Note: This is recommended to use the template TEMPLATE_username_description-of-the-process.prg as a starting point.
- Use the commands Add Step, Insert Step, Cut Step, Copy Step, Paste Step, Delete Step to add or remove a step.
- Drag and drop subroutines from the main library to the recipe
- Modify values for the Time, Thickness, Height or Temperature. Note: Values which can be changed in the recipe can be easily identified. Please check the name of the subroutine and find the parameter followed by a question mark ?.
- Save the recipe Save.
IV. Restrictions and precautions
- In case of use of the chip holder: All holes have to be closed / protected to prevent threads and fixtures exposure (During the ion milling and/or evaporation). Screws have to be screwed in but without protruding from the rear face of the holder.